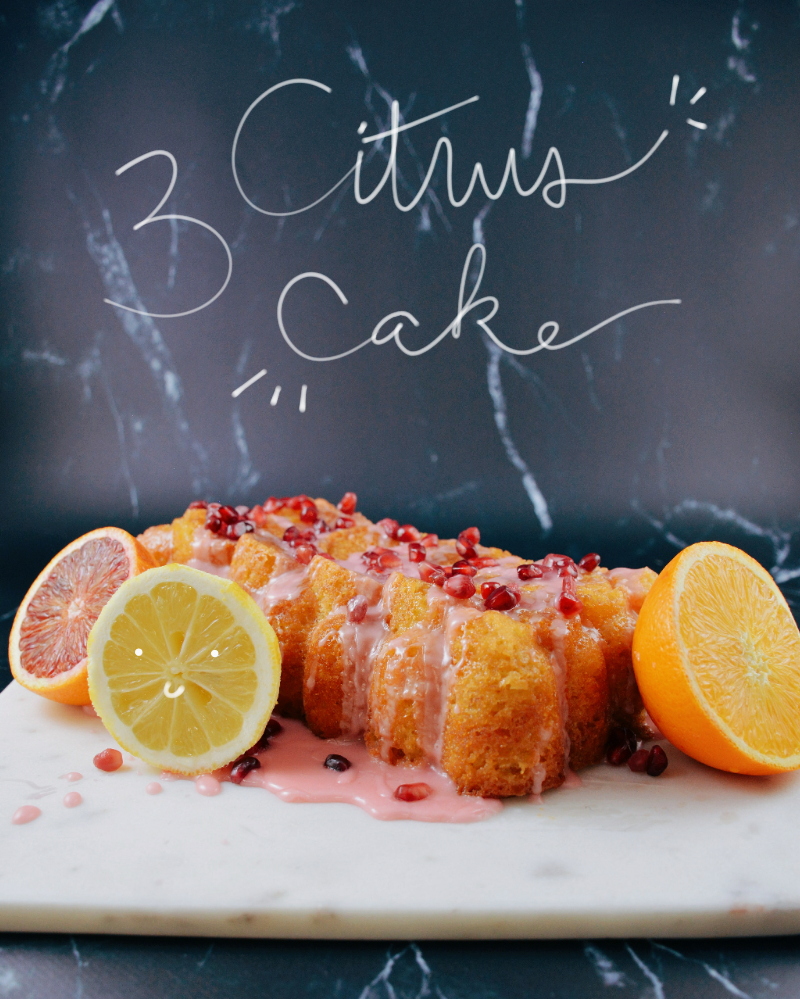
Well, MEA CULPA. Admittedly, I meant to make this post much sooner – say, back in April when these photos were actually taken – but life happens! Which might be code for “I got lazy and distracted”. Perhaps. Like I said: the Culpa, it is Mea.
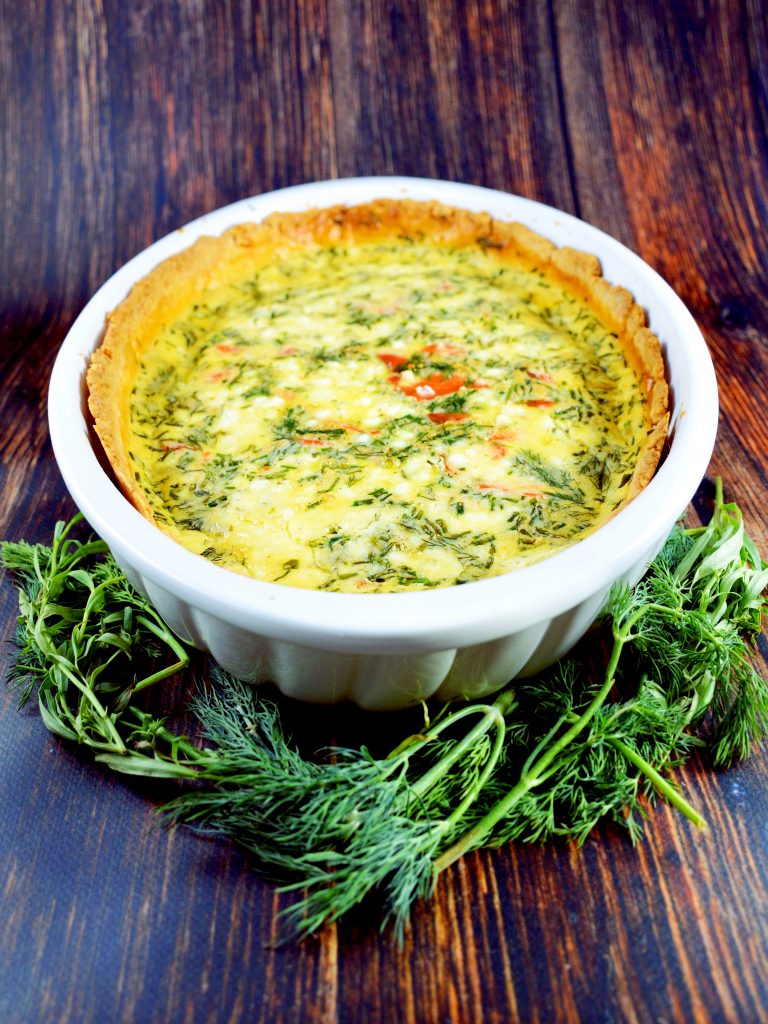
I felt inspired to put this quiche together when spring was finally making its first appearance in my neck of the woods. Luckily, it works just as well as a light entrée in summer as it did in spring. As someone who loves nothing more than a packed smoked salmon bagel sandwich, I’m also Very Into finding any excuse to incorporate those elements into whatever I’m eating. Smoked salmon and dill, always and forever. I only wish I had thought to push the bagel-sandwich inspiration all the way – this quiche looks like it would be perfect served with a dollop of whipped herb cream cheese (blended with tarragon, chives and dill), slivered red onion and capers.
You might look at this recipe and be thrown by the staggering number of eggs – WORRY NOT EVERYBODY, I just used a truly enormous (read: 12-inch, oblong) baking dish. Your standard 9-inch pie or tart dish will likely only need five – feel free to keep the proportions of the other filling items the same, because who doesn’t love an overstuffed quiche?
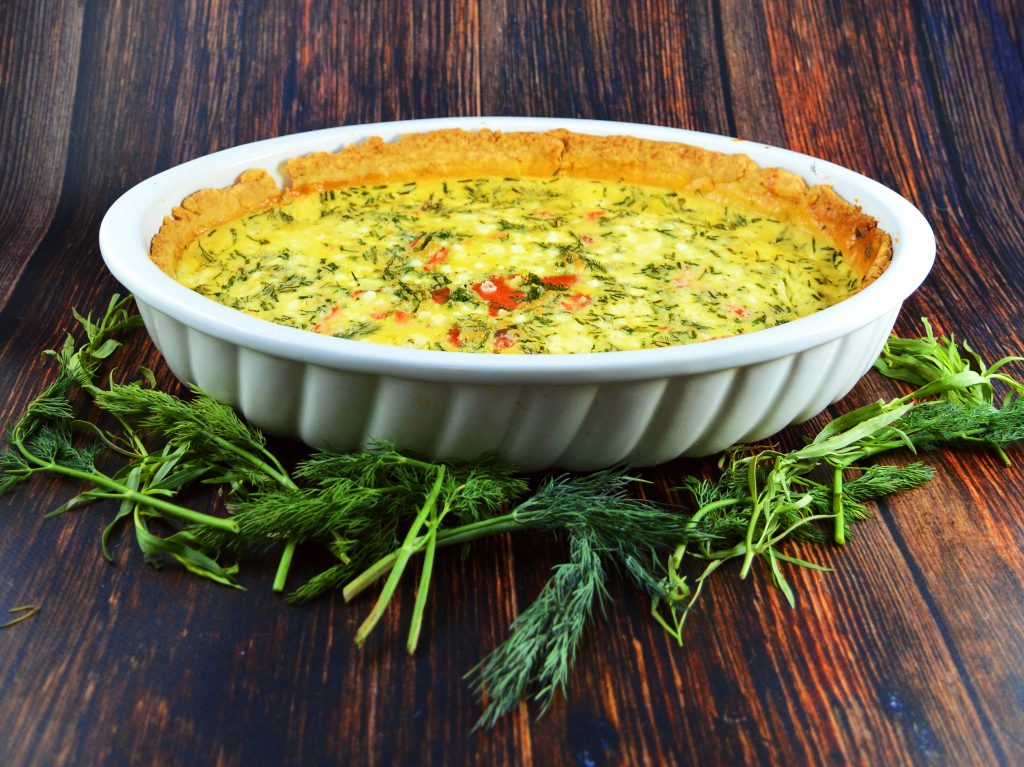
Smoked Salmon Quiche
This herbaceous quiche is the perfect light and satisfying entrée for spring or summer.
Ingredients
For the crust:
- 1 1/4 cup all-purpose flour
- 1 Tbsp sugar
- 1/4 tsp salt
- 1/2 cup cold butter cut into 1/4 inch cubes
- 4 Tbsp ice water
For the filling:
- 8 eggs (for a 12 inch baking vessel - for a standard pie or tart pan, 5 eggs will do)
- 3/4 cup heavy cream
- 1/2 tsp kosher salt
- 1/2 tsp pepper
- 1 pinch cayenne pepper
- 5 slices smoked salmon chopped roughly
- 1/4 cup goat cheese
- 3 Tbsp fresh dill
- 3 Tbsp fresh chives, chopped
Instructions
-
Preheat your oven to 375° F.
-
Stir together the flour, sugar and salt in a large bowl. Add the butter to this mixture and toss to coat, and then mix in a food processor or mixer (or cut by hand with a pastry cutter) until the mixture has the appearance of coarse cornmeal and none of the butter pieces are larger than a pea. Add the ice water while mixing at low speed or with a fork until the dough pulls together. If the dough is too sticky or too dry, sparingly add more flour or ice water, respectively.
-
Sprinkle flour over your work surface and transfer the dough, pulling it together and patting it out into a flat disk with your hands and then a floured rolling pin. Lightly dust the top of the disk with flour and roll it out until it's about 1/8 of an inch thick and will fill your chosen quiche vessel. (Alternatively, you can put the dough disk between two sheets of parchment paper and roll it out to prevent it from sticking to the rolling pin or your work surface.)
-
Grease your tart or quiche dish with butter and press the dough in, then cut the edges of the dough with a knife so they're level with the top of your baking vessel. Prick the dough with a fork along the bottom, and then lay a large sheet of parchment paper over top and fill with pie weights or dry beans. Blind bake the crust for 15 minutes.
-
While the crust blind bakes, assemble your filling: whisk together the eggs with the cream, salt, pepper, and cayenne. Once the crust has finished its preliminary bake, remove it (and the pie weights, of course), and pour in your filling. Top evenly with the smoked salmon pieces, dill, chives, and crumbled pieces of the goat cheese. Bake for 35 - 40 minutes (your bake time may vary based on your oven and the size of your vessel), or until the center appears set when jiggling the pan slightly. Optional: Serve with whipped cream cheese with dill, chives, and tarragon; red onion; and capers.
Recipe Notes
Adapted from FoodieCrush's Puff Pastry Smoked Salmon and Goat Cheese Quiche.